HP EliteBook boot from USB to install Windows
If You wish to format Your HP Elitebook Computer and reinstall your operating system using a USB Drive, I advise you to carefully follow this Tutorial.
- The first thing to do is to prepare your USB key. For this, you must create a USB key that can be plugged into the operating system you want to be installed on your HP Elitebook Computer.
- Insert your USB key into any USB port on your HP Elitebook computer and turn it ON.
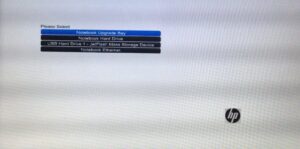
- Press and HOLD F9 Key to Open Boot Menu Device Options.
- Use UP and DOWN arrow keys to boot from USB drive and Press Enter ( The generic HP boot menu keys are Esc and F9).

This Article Explains to you How To Put Multiple ISO Files In One Bootable USB Disk | Create Multiboot USB Disk
If you cannot select the USB flash drive from the Boot Menu, try to disable Secure Boot and Enable LEGACY Mode in BIOS Setup.
This Video explains to you these instructions more clearly, to enter the boot menu of your HPelitebook.
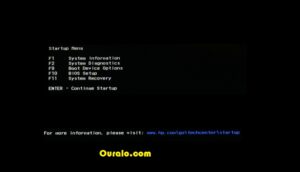
HP Elitebook Boot Options
- System Information (F1): This shows the basic information about your computer HP Elitebook including manufacturer, product name, SKU number, serial number, BIOS revision, BIOS date, type speed of the processor, and memory size.
- System Diagnostics (F2): HP Elitebook Hardware Diagnostics tool. It includes a series of tests to check for hardware failures on your PC. helps you test major PC components even when you cannot access the operating system.
- Boot Device Options (F9): Provides UEFI boot sources on your HP Elitebook (like Windows boot manager or network card) and LEGACY boot sources (like hard drive, USB key, or DVD drive) for you to choose from.
- BIOS Setup (F10): this option allows you to exit UEFI and enter BIOS. There are 5 tabs in the BIOS Setup to help you change PC BIOS Settings.
- System Recovery (F11): Reset your HP Elitebook to the Factory Settings using System Recovery.

More Detail Click Here
Leave a Reply